Search This Blog

Saturday, December 14, 2013

Sam in Wonderland

Thus grew the tale of Wonderland
Thus slowly, one by one,
Its quaint events were hammered out-
And now the tale is done,
And home we steer a merry crew,
Beneath the setting sun."

 The "slowly, one by one" part sounds a lot like beading, no?

Stay with me.  I want to show you a necklace that involves beading, Alice in Wonderland, and a "sleeve."

A sleeve is an armful of tatoo.  The ENTIRE arm, usually from shoulder to wrist.  This must seem like random information but it is pertinent because I have a beautiful niece (Samantha, an animal welfare technician for a humane society) with an Alice in Wonderland sleeve. Here is how it looked after her first session with the needle.  Her bravery is vastly superior to my own!


Do you see Alice, the cards, the catepillar and his hookah, and the edge of the white rabbit?

About this time, when the sleeve was in this stage, I found a cabochon from Sandy Spivey with Alice imagery.  I thought it would be perfect for Samantha, and bought it.


Now unfortunately, this particular imagery is by a different artist than Sam's sleeve.  This is a Arthur Rackham illustration, in my opinion, among his best.  Her sleeve uses the illustrations of Sir John Tenniel.  Lots of different artists have taken on the illustration work, including Salvador Dali, but the Tenniel ones are more popular and familar to most people.  I worried that she might consider this a clash, (of style or maybe values) but finally this fall, decided that I would make it up for her and let her decide if it was wearable.

I wanted to honor the barely colorized, sepia look of the cab, so chose muted colors from the cab itself.


I used a delicate matte gold 24k delica in the bezel and some hints of pink and bronze, with a dab of Miyuki Baroque pearls in the surrounding embellishment and the stringing.  I really enjoyed working with the superduos at the edge, but every effort I made with them in the yoke was very rigid and unpleasantly inflexible, so I finally decided that a strung yoke was the best way to encorporate everything I wanted .


I have to admit, I have lost track of the number of piercings in Samantha's ears, but I felt that two earrings would fill at least some of them, if she wanted to wear them, and bravely wire-wrapped cherry quartz points to suit the purpose.

Now, the sleeve is, I believe, complete and really pretty awesome.  It has super vibrant color, which my work lacks.

I know my feeble effort is quiet by comparison, but Sam seems to be pleased with it, and I was happy to do it for her.

If I get really lucky, some day, perhaps Sam will model the necklace for me and send me a picture!

Tuesday, December 10, 2013

Meeting Challenges

I have been an Etsy Beadweaver for almost four years.  During those years I have learned a lot about beading, photography, competition, the nature of people, (especially in groups) and about myself.  Most of the work in my Etsy shop was created for monthly challenges sponsored by the team.  The challenges have stretched me, encouraged me to step away from my comfort zone, and use materials, colors, techniques, and inspiration I would not otherwise have used. I have tried to win, and I have tried NOT to win, but I believe that just participating as often as I am able is beneficial in many ways. Like any endeavor, you get out what you put in, no matter what your goal.

There is a challenge underway currently, and I thought I would not have time to participate.  But as I looked as my teammates answers to the challenge, I decided I wanted to play along, and I took one weekend and stepped "Out of This World" with my beads, to create a piece I call Klingon Courtship Necklace.

 
 I do not think this is a brilliant piece of design work.  It's good, although I think it lacks clarity and focus.  I like it, and have given it a couple test wearings, and people who see it, like it too, and comment on it. It is certainly possible to knock out a little piece like this in a day or two, in between the laundry and Christmas cards.  If it was the sort of thing I did all the time, I might even be able to produce a really good bit of design work in that time. I love to bead and to design with beads, but for me, beading is a hobby.  To do a good job with design, I have to do the two-steps-forward-one-step-back dance of exploration and discovery.  And that requires time to think, and experiment. Klingon Courtship has garnered a couple votes from my teammates, which I always take as high honor.  Whoever you are, thank you so much for your votes of confidence!


I made a simple pair of earrings to go with it, because I like to wear earrings with a necklace, and I didn't have a pair that looked right.  So they will be sold with the necklace... a little bonus!

There are some interesting and wonderful pieces in this challenge and you can see them all and vote for your particular favorite at our team blog.  Please do!  Sometimes the breadth of ideas our team has really delights me.  I usually like the work that best meets the specific requirements of the challenge. The work that makes me feel something, and illustrates the theme in beads.  You might like that too, or the prettiest work, or the one done in your favorite color.  It's all good.   :)

I also participated in the November challenge, and learned to make Russian leaves, which is essentially increasing and decreasing peyote stitch at the end of each row.  I can see wonderful potential for this technique and look forward to trying out some ideas I had while making enough leaves to cement the process in my head and hands.

I got to write this challenge, as reward for winning the September challenge.  The idea was to use a picture postcard as a color palette, trying to get the hue, value, intensity and proportion of the color in the postcard to appear in the beadwork, which could be anything except a copy of the card.  I did assignments similar to this in a weaving class, and was reminded of those assignments in gift shops on my vacation.  I thought it might make good challenge.

I think the color and proportion is reasonably accurate, although I found I did not want to put in the aqua blue of the little river.  I finally did it with dew-like drop beads, but there many not be enough of them to really represent that color proportionately well.


The shape is a little mundane, but again, I like it well enough, and in test-wearing it, I found it was liked by others as well.  I really enjoy people noticing my beadwoven jewelry, especially those who have not seen beadwork before.  Their reactions please me, and I hope they are inspired to give the technique a try themselves.

I have not been the best blogger this year.  I am finding that trying to maintain two websites, two blogs, and keep up with the constant ebb and flow of beadwork, my clients, and friends on facebook to be a time consuming adventure, on top of my business.  I enjoy it all, but it is hard to always be entirely up to date.  So this post catches up with my work in the last two Etsy Beadweaver's challenges.

Our team will have a new leader in 2014, and see some changes in the next year. I hope challenges will always be a part of the team activity.  Do you belong to a team, or teams?  Do you benefit from membership?  What makes you join a group?

Tuesday, December 3, 2013

Three Tools I Love

A reader, Jen, contacted me about some of the things is use in my work, and asked that I write about my tool kit.  It has taken me a while to assemble this post, but finally, here we go!

I think MOST of the tools I use and how I use them are common place, but I do a few things differently than most beaders.  So to begin I will talk about the use of thimbles.  I use one.  ALL the time.  Depending my my mood and the project, I choose between two different kinds.  One, I began using when I was tailoring at the Guthrie Theater.

Every professional tailor I know uses a thimble, and most professional stitchers do too, but I have never run across another beader who does.  I generally prefer my open-end tailors thimble above.  It's cooler, and usually my go-to choice in the summer.  Whether open or closed, every thimble has dimples, which allow you to connect with the eye of the needle in a slip-free way.

Fit matters.  Your thimble must be snug, but not tight, on your middle finger, and it should not contact your first finger joint when your finger flexes.  Blow into it before you put it on, and the moisture from your breath helps seal it to your finger. When I first tried to use a thimble, I had been sewing for at least 10 years.  It felt ridiculous, bulky and unpleasant, and I thought I would NEVER get used to it.  But after a few days of constant use, I found I could not do without it. It eases the stress through your entire working hand and arm, and I find even my shoulder tenses if I do not have a thimble and try to sew or bead.   I am also faster with it, because you can connect the two step, push and pull process that is sewing into one fluid motion.


Here is the beginning of a stitch, which could be through a bead just as easily as fabric.  You are holding your needle in your dominant hand, and your work in the other.  You aim the stitch you mean to take, and push the needle into the right spot.  If you are sewing without a thimble, you must do this by SQUEEZING your finger and thumb tightly on the needle, and then let go of the needle, move your fingers to the other side of the stitch, SQUEEZE it again and pull it through.  But if you are wearing a thimble, your fingers can relax on the needle and just steer, while your middle finger does all the pushing.  The side of your middle finger keeps the needle moving, while you re-position your fingers on the other side of the stitch.  I moved my thumb out of the way to show you how my middle finger is positioned in this picture.


The middle, thimble-armoured finger pushes the needle along its path, all the way to the eye, while your fingers reposition themselves to provide the final impetus that finishes each stitch.  So here is the end of the stroke, with my thumb and index finger pulled out of the way to show you the process.

But really, my fingers slide straight across the needle, to reposition and ease the needle through the final step of the stitch.

For me, this is just a faster, easier, and less stressful way to take a stitch.  My most critical tools are my thimbles.  I buy them at Wawak.com and this link will take you to the two pages of thimbles. Skip past the Clover and Dritz offernngs, to the "Wawak"ones. ( If my memory serves, the even numbered ones are English and the odd German, but this could be entirely wrong!)  I have very small fingers and wear a 4 or 5.  An average finger is probably an 8 or 9.  You may have to try several to get a good fit, or you may find that in the summer, you prefer a larger size and a smaller one in the winter.  It's worth fiddling around and getting good ones.  I have many, because I can lose a couple in a day as I work.  You will see Russian thimbles that have slots instead of dimples and they work OK, but, for me, the best control happens with the dimples.  Quilters leather thimbles?  Metal cut-aways? what ever works best for you.


This is my favorite thimble. I took it from my mom's sewing chest when I cleaned out her house, and it has a lovely feeling on my hand.  I have since done some research, and I think it was my Great Paternal Grandmother's engagement gift.  Before the DeBeers made diamonds the engagement gift requirement, thimbles were made by gold and silversmiths, and since household skills were valued, they were common engagement gifts.  I love how it fits, almost as though made for me, and I love the attached karma.

Jen asked specifically about two tools I use all the time, for thread control, and I'll talk about these tools next.  First Bead Stoppers.  This link goes to the Beadalon site, one provider of these little goodies, and they provide lists of retailers who sell their products.


I use these all the time in many ways.  Almost every time I begin a new component, I use this handy wire spring clip to determine how much tail I want to leave, and then to establish tension to make starting easier. I clamp the stopper an inch or two from my starting point, slip it to the back of my hand between my middle and ring fingers, and work against the tension provided by the stopper.  I leave the stopper in place while I work, moving it further from my work and allowing gravity to keep the tail away from my fingers and needle.


When I have multiple components and am working on layout, I can clamp threads for groups of components together to keep them out of my way and the handy loop on the stopper can be pinned to my form, like this:


In a couple places you can see I wrapped my many threads around the work, but this is a silly idea and invariably results in knots and tangles.  Don't do it.  :)

Once it is time to sew together multiple components, I use a different tool for thread control.  The stoppers are great in planning, and for individual components, but they do tend to catch my thread if I am joining many components at once.  So, time for the EZ Bob Bobbin!


I almost always use the longest thread I can manage when I bead, and leave a healthy tail when I begin.  I find that having thread available for connections and embellishment,without having to add improves the neatness of beadwork.  When I finish a component, I secure the thread so I COULD cut it off, but I never do until the very end of the project.  So I often have many working threads available.  I control all those threads while I bead with EZ Bobs.  They are made for use as kumihimo bobbins for beginners, and are available at most yarn shops.  I found listings on Amazon and eBay too, and I know many bead shops sell them as well.  The fact that when closed they are a smooth round dome with no corners or edges to catch my thread is great.  I can capture many threads together, usually using a bobbin for each side of the work, or if its really big, each section of work, and still be able to bead without getting caught on the multitude threads or the spring ends of the Bead Stoppers.  Sometimes I even combine both means of thread control!


Bead stoppers can also be used in stringing and testing fit.  I use a small stopper for each strand I am stringing, and a big stopper to tie the stoppered ends together to test fit. 

I could go on. I am a wordy girl!  But it was the thread control devices I was asked about and it was quite a while back.  And this post is plenty long without my taking on threads and conditioners, which would be my next thought.  So Jen, I hope this answers the questions you had, and if anyone is curious about anything else they see me doing, please just ask and I will try to respond in a more timely way!


Thursday, October 31, 2013

Painless Custom Design!

I recently read a post in Warren Feld's Jewelry Design Discussion Group on Facebook about doing commissioned custom design work.  I responded, and then, instantly a prospective client contacted me, as if to test my response.  I said I thought that successful custom work was all about communication, so, just for fun, here it is!

hello marsha
i would like to know if you ever create custom pieces, and if you might consider making a necklace for me. i have a very small piece of turquiose with a pre- drilled hole.
i would really love a piece of your artwork. it is absolutely beautiful! i would want something relatively small and simple and you could just incorporate the turquiose as your artistic ability sees fit.
thank you for your time. i hope to hear from you.
jennifer

Hello Jennifer,
I would certainly consider custom work for you. I would need to know if you have a time deadline, and if you have a price point in mind. I really appreciate the idea at you would just send me the turquoise and let me do with it whatever it tells me to do. :). I would also need to know the measurement of the base of your neck, and if you have a specific length in mind, let me know that as well. I am assuming that you want at least some bead weaving, since that is pretty much what I do.

Thank you so much for you interest in my work! How did you find me, if you don't mind my asking?
Marsha
(I have to admit, I was screening here. Part of doing effective custom design is having an appropriate client, and she was sounding good!)

hi marsha

thank you for getting back to me so quickly. i do not have a deadline of any kind. as far as price, if you were able to keep it under $150 that would be great. i do realize that there may be a custom order fee, so if you have to go a little above that then that would be ok.


yes, i would definitly want you to incorporate the turquoise into a bead woven piece. i love the beaded bezels, and started looking on etsy at bead weaving, thinking that it might suit the turquoise quite nicely. i find your art far superior to the others i've seen. your stitches are tight and uniform, and i love your expressive use of color. i feel as if you have a slightly modern take on a traditional art form.


i am out of town exhibiting at an art show. if you decide that this is indeed something you would be willing to do for me, i could send measurements next week.

thanks again for your consideration! jennifer

(I just loved it that the woman was an artist herself!!!  It seemed a good sign.  She has probably done custom work herself, and maybe has a sense of how challenging it can be, and I liked all her responses and her attitude.  I decided to do the project, and was very curious about her piece of turquoise!)

Dear Jennifer,

I will be delighted take on your project. When ever you are ready to begin, send me your piece of turquoise. I will make a listing for you for a custom project and you will pay $75 down before I begin. Then I will list the finished item and you can pay the remaining $75 when I am ready to ship to you, plus the shipping cost, usually $5. I do not have an extra charge for custom work. I just try to keep track of time and spend an appropriate amount of time for the expected cost. I promise to finish before Christmas, and probably sooner than that, but I have a full time job in addition to beadwork, and am also in the process of some remodeling, so my life is a little crazy this fall.

Your artwork is very cool, and quite steampunk-ish. Should your turquoise piece include a gear or key, maybe, or do you have a feeling I should keep in mind when I work??

My address is:
Marsha Wiest-Hines
2201 Windsor Lake Drive
Minnetonka, MN 55305
Thank you!  Marsha

(I assumed I would spend way, way too much time designing and wanted to have her be OK with the $150, so I proceeded as though that would be the cost.  She was anxious to move ahead.

yeah! i'm so excited.
i'd prefer it not look like steampunk. my art could probably be classified as such, although that was not my intent when i started about 4 or 5 years ago. I would rather it be more classic and timeless. I don't care for diagonal or zigzag lines. I have reddish-auburn hair, blue eyes, and fair skin. In clothing, i tend to stick with neutral colors. a lot of brown.
I am having trouble figuring length. the base of my neck measures about 15". I have an old rhinestone necklace. I put it on and will send a pic. the chain is 16.5" long. from the top of the focal stone to the bottom of the longest dangle is 2". I think the proportions look nice on me. I suppose it could go wider. it's up to you. whatever you think.

I will mail it on thurs or fri. whenever you create a listing, I will pay right away. if you need any more info, just let me know.


I can't wait to see what you and the little piece of turquoise "finger" out. I know it will be beautiful.


(I talk about "fingering things out" as I design in my shop statement.  She had gone to the trouble to read what I had written.  YAY!  And the information she sent was terrific.  Some of her requests popped out at me, and I have highlighted those.  They are the things I considered first as I designed.  I will keep her photo private, but it was a pretty simple piece and nicely proportioned. I decided it was a good thing she does not look at what I make for my dancers!!)


Hi Jennifer,

Pictures and measurements are always helpful and thank you for the personal info as well!
I was thinking to wait until I got the piece of turquoise to post the down payment listing, but I can do it now if that is your preference. I am not a steampunk queen, so while I think I could do it justice, I am just as glad that is not what you want. :)

I am really looking forward to seeing your stone and having it in my hands!

Thanks so much! Marsha

thank you. i have packaged the turquoise and will ship it today.
jennifer

Yay! Thank you! I am looking forward to working on your project. :)

Marsha

i am too :)

(I created the listing and she paid promptly. And a few days later, the turquoise arrived.  She was not exaggerating when she said very small. It was rectangular, about 1/4" wide and just under 3/8" tall, and had a slightly off center hole drilled through it, near one end.  One flat side had delicate carving.  I WISH I had taken a shot of the turquoise before I made the necklace, but here's a closeup, as it sits in the finished piece.


(I decided to feature the carving, which alternately reminds me of an elephant or maybe those things in the Pacman game that gobbled dots.  Maybe I should have asked about imagery and orientation, but I just liked the little carving and decided to feature it.  I think it is really a decent piece of turquoise, from it's texture and color, and I immediately wanted to honor it with other good quality materials.  And since she wanted a bezel, I needed a cabochon.)

Jennifer, I have your sweet little chip and will have time to think and design a little this week. Is it OK if I add another turquoise cabochon to it? It really is too small to be a focal by itself, but I imagine it can be like "jewelry" for a larger piece. Marsha

yes, definitly. i knew it would be too small to use as the focal piece. so, yes if it can just be incorporated somehow, that would be great. design with it and add whatever you wish. i so appreciate it, and by looking at all of your other pieces, i know whatever you come up with will be beautiful!

i look forward to seeing it. thanks again.

jennifer

(She is so civilized and realistic.  Feeling good about her really helps my ability to let go and let ideas flow.  I think there is as much a knack to commissioning work as there is to designing for clients, and she rocks the process!!!  Several days passed and after fiddling with several of shapes and colors from my stash of turquoise cabs, I chose and bezeled a teardrop of unstabilized Sleeping Beauty turquoise in Dark Gold 24k Miyuki delicas.  They are the "brownest" of the precious metal- plated cylinders and I love them with turquoise.  I thought the teardrop shape might look beautiful "wearing" the little rectangle piece as "jewelry" as I was imagining.  I also liked the color of the unstabilized stone with the little chip, and thought they could happily share focus, in terms of hue, value and intensity.

Then I roughed out a wrap of tiny 2mm darker turquoise rounds for the cab, transitioning to some yummy Kingman mine bronze infused 4mm rounds, and fiddled for a long time, finally managing a double needle process that held the chip the way I wanted it to lie, and reasonably straight, given the off center hole. Although I was not completely satisfied with the result, I thought it was the right idea, and wanted to get client feedback before moving ahead.  I did this as confidently as possible, while allowing her to say no if she was not happy.)  

Hi Jennifer,
I have an idea roughed out and ready to finish, but I want do show you before I go any further. I believe the proportions are about the same as the rhinestone necklace you showed me. I hope I have featured your little chip, while providing it substance and a beautiful framework. My plan is to finish the yoke with the beads I have used thus far. This finished piece has a really nice Sleeping Beauty mine turquoise teardrop cabochon, and some of the beads are from the Kingman mine, with a bronze infusion. I think your piece is real and probably Sleeping Beauty in origin, but it wanted to cover both the good sources, so it could feel "at home" in its new situation. I do have bigger " Chinese turquoise" beads that I could use in the yoke, or I could embellish it, but I am inclined to keep it simple and let the focal be the star of the work.

Do you like toggle style clasps, or do you prefer a lobster claw style with an extender chain?

If you do not like this, or wish it were different in any way, please feel free to say so.

This is a terrible photo, taken with my iPad and the color is not very real. It is better in person. :)

Waiting to hear, Marsha

Oh, I meant to say as well, if I finish it as I have suggested, I think the final price would be $120.00. Just FYI. Marsha


(It really was a terrible photo!!!  And perhaps I should have done better, but I didn't.  It is hard to understand scale from it.  Luckily it worked...)

oh marsha, it's beautiful! just perfect! i love it, so go ahead and finish it like you planned. i think i would prefer a lobster clasp, if that will work ok with it.

do you take etsy gift cards? i was going to use one for part of the payment. i know i have to use direct checkout instead of paypal, but i didn't see that option the first time. no big deal if you don't.


thanks!

jennifer

Oh good, Jennifer! I will get it finished up early next week.

I have to vend at a ballroom competition all day tomorrow. Lol, kind of like selling at an art fair, except with tons of makeup, false eyelashes and fake tans. You feel naked without mascara! So, much though I would love to finish it immediately, I will probably be ready to ship mid next week.

I take credit cards, debit cards, Etsy gift cards and paypal. Did you have trouble with checkout on any of those methods? If you do not mind, I would like to take good photos and list it in my shop, reserved just for you when I am done. I would also love to share it on fB and my blog, if that is ok. Once listed, you can pay when you are ready, and I will get it in the mail to you.

So glad I fingered out something you like!!

Marsha

(Hmmm... almost too easy.  I wanted to rework several things.  I thought the transition from small to larger beads in the surround connecting with the chip was pretty klunky and wanted to smooth it out by starting the larger beads one position higher and creating a nice, smoothly continuous edge.  Plus, I wasn't crazy about the top of my bezel.  So I ripped it apart entirely, and re-created with the improvements I had in mind.  And then I got another message from my client.)

hi marsha
my brain has been slowly clicking, and now i have a question, only if you haven't gone any farther........on the straight part, the yolk, i think, what if it was like it is now, but there were only 2 or 3 round turquoise beads on each side? then finished with the smaller beads that you have used, or something else a little smaller and more neutral. to my eye it would seem less formal. i want to feel comfortable with it so i can enjoy wearing it more often. if by chance you have already finished it, i do love it as is.

wow! you're good. you are correct about the origin of the piece i sent . it did come from the globe/superior, az area. as far as taking pics, yes, go right ahead. you can use them any way you wish. i would be honored to have it part of your blog. when you were talking about the square, blue ocean necklace, i found it very interesting that math came into play. (maybe that's why i don't bead) :)


let me know your thoughts on changing the necklace part. thanks!


jennifer

(Actually, the yoke was bothering me too.  I was pretty convinced about the beads, but willing to put in more of the seeds between them. What I was offended by was the lighter color some of the turquoise beads I was using.  I felt they were stealing focus from the cab and the carving.  I also thought maybe she was just asking for simpler, since she mentioned, "less formal" and "comfortable."  So I did two things.  First I waited at least a day before I did anything.  I know from my costume business that time to think is always a good thing.)

I will get back to you on Monday or Tuesday, going to bed so I can be up, load the van,and be off to my event before dawn. I think I understand what you want and will show you then. :)

(Then I strung a strap without the high contrast annoyance of the lighter colored beads on one side and more of the brown beads, although I didn't eliminate the turquoise beads.   I pinned on a simple chain on the other side after just a few of the beads, so she could say that was what she wanted, but with brown beads only.  And I sent her to look at photos of some similar pieces that I think are very relaxed, and yet quietly elegant.)

Hi Jennifer,

So finally I am ready to show you a couple options. I would like you to go and take a look at a page on my blog. Scroll down to the jasper necklaces. They are strung with semi-precious beads like the Kingman turquoise I have used on your necklace, and I want you to see that the end result is really not especially formal.www.hauteicebeadworks.blogspot.com/p/2010-gallery.html

On the other hand, this is your necklace, and I want you to love it. On the left side, I have spaced out the turquoise with more of the shiny metallic beads, which might be what you were thinking of. I would like to use at least some of the beads at the connection of the yoke to the pendant, so it can appear that the yoke just wraps around the pendant... That was my design idea here. But it could be just a few beads, enough to establish the idea, and then we could switch to vintag brass chain if you prefer.

Here's another not very good photo. What do you think?

Marsha
Above, The two new possibilities...
One of the stone bead yokes I thought was a good example of relaxed but elegant.
And the other, a yet more casual piece, without the crystal of the first.

hi marsha

yes, the second version with the beads is what i was thinking. after looking at both versions, i do prefer the original one. the second one loses something, or looks detached in some way. almost like they are 2 different necklaces.

so, i should have listened to your trained eye, because you are obviously very good at what you do. thank you for showing me the difference. now i won't be forever wondering.


i do love your original version. if you can finish it like you were thinking, that would be great. i love it!


thanks!

jennifer

(So finally, I took the information my client provided and my own opinions and aesthetic, and created a yoke that clearly delineated the idea of the strap wrapped around the bezel, using both the Kingman bronze infused 4mm beads and some slightly smaller solid deep cyan turquoise.  It was my best effort to meet all requirements and be pleased with the results myself as well.)


I like the sleek silhouette of the focal surround, and I am pleased with the beaded yoke as well, given the gradation I established and the alternating larger and smaller but deep turquoise color, which lets the chip and the cab be the stars of the show.  Everything else quietly assumes a colorful but subdued supporting role.


Jennifer, you have been so kind and trusting. Thank you. I am finished and will post the final results in my shop shortly, reserved for you, You can purchase it when you are ready and I will get it in the mail to you. I am working on a blog post and will send you a link when I am finished with it. If you find there is anything you are not happy with, please just let me know and I can adjust it for you. I am pleased, and hope you will be too. Since all the beads and tools were out, I made you a very simple pair of earrings I think will compliment the necklace as a gift for you. If I can ever be of service again, please let me know. It was a pleasure working for you!

Warmly, Marsha

Do you have strategies for successful custom work?  Special ways you like to work?  Please share!

Monday, September 9, 2013

"Pink Cadillac"

 
The Etsy Beadweavers September 2013 theme is "My Favorite Song" and I had some gorgeous pieces of Rhodocrosite that reminded me of  an awesome two-tone pink Chevrolet my parents drove when I was a little girl.  It was Champagne and Dusty Rose and I thought it was SO COOL!   I wanted to use those cabs, and somehow the song "Pink Cadillac" popped into my mind. 
  

I had a chat with my BFF Google Images, and found several juicy places to start. I went first to a caddy of my own vintage, 1953, but that was not recognizable.  I must have been too young.  :) But when when I got to the later 50's, I found things I remembered!  I felt that using vintage cars could help me avoid the Mary Kay association, which I wanted to avoid.  I find I am at my best when I am working with ideas that have meaning in my own life.  The vintage cars just felt right to me. 

I tried to think, what about a car is worthy of jewelry.  The whole front end seemed to be full of great ideas.  I loved the grille, so started with that.


I absolutely ADORED the bumpers.  They were shaped like bullets, or maybe bombs, and I made a couple tries at them.  They looked like breasts to me, or my own first circle-stitched bras, and this made me laugh, but they were not quite the right image!

 
According to wikipedia, the song (as written) is not really about a car.  And the lyrics bear testiment to that.  Bruce Springstein meant it as a metaphor for sexual activity.  I didn't really want to go there!  I loved the Natalie Cole version, which was a chart topping cha cha at the time I worked as a professional ballroom dancer.  She WAS talking about a car...  So out with "the boss's" breast images, and in with the ones that looked more like lipsitck to me.  Those are cherry quartz. 
 
 
 Then I thought the license place had a pendant quality.  SO time for the Rhodocrosite cabochon.  And I remembered fuzzy dice, and I think that figured into the fringe I created!
 
 
 And there there were those funky hooded headlights, which I thought were pretty amazing too!
 
 
 But these, I just could not use.  When I put them in place, the whole thing took on a disturbing doofy face identity, and that was NOT what I wanted.  It is one of my personal pet peeves in jewelry, in fact.  So instead, I created a hood ornament/logo component, with the underlining V shape and the cadillac crown image, loosely defined.
 
 
This was such a fun journey!  I hope you enjoyed it too, and I also hope you will visit our Etsy Beadweavers team blog between the 9th and 15th of September and choose your Favorite Song entry!  My team rocks, and there are many heartfelt and clever beadwoven beauties to look at.
  

Wednesday, August 14, 2013

Oceanaire, Magic Numbers, and Square Bezels


I am never very successful when I set out to create something that I imagine other people might like to make.  All around me, my beady friends are creating tutorials for their designs and selling them.  I am torn by this.  I have very little time available to spend with beads, given I have a demanding full time job.  I really enjoy the design and engineering aspects of beadweaving.  I want to maximize my time with those things.  But I also feel selfish for not sharing my ideas.  So every so often, I take a little stab at designing something that I think might be a decent tutorial.

Usually, I ask myself, what do I do that I see others either NOT doing, or struggling with.  I am a very competent bezeler.  And I can manage any shape, scale, and proportion with relative ease.  So I decided I would bezel a popular and recent cab, a lunasoft, in a shape that people seem to struggle with, and create something from it. 

I owned some of these, purchased from my friend Doris Coghill, in a lovely ocean blue and since the Etsy Beadweavers theme for August was "Ocean Adventures" is seemed a good fit.

As I worked out the bezel bead counts and decreases I took pictures.  I thought that the tutorial might include general informaton about how to create bezels for geometrtic shapes as well as this particular one.  So... generally, NUMBERS MATTER,  when creating bezels.  Your base row must be an even number.  And some numbers are just better than others, like any number with multiple even divisiors, like for example, 24 (12, 6, 3)  is better than any even number that can only be evenly divided once, before an odd number appears, like 30 (15).  This is because bezels look best if they are balanced side to side.  On a round bezel, this is less important, and ovals can be cheated as well, but to get to the point, geometric shapes demand even base row numbers that are divisible by the number of sides of the shape.  So my choices for base row numbers for any square must be divisible by four.   

I strung delicas until I had about the right number of delica beads to encircle my lunasoft cab.  In this particular case, I wanted to create a color shift in my bezel, so I alternated a dark (1285) and lighter blue (0863) bead.  Then, I hunted for the perfect number.  The number of beads has to be divisible by 4, and the ring of beads cannot be loose on the cab.  Your base row can be a little too tight, or a little too loose.  For me, the perfect number in this case was 64.  It divided SO nicely!  64, 32, 16, 8, 4, 2.  64 is one of the magical numbers in bezel beading!   And it was just a tiny bit too tight, when pulled up snugly, to fit entirely around my cabochon.  Lucky me!  My Lunasoft cab is 20x20mm, so this magic number 64 would work beautifully for any cab that size as a base row. I will later enlarge it at the corners enough to fit.

When I bezel, I start differently, depending on my purpose.  In this case, I wanted the front of the bezel to create a white cap effect, so I worked the front of the cab first. I strung my beads on a 60" length of fireline, waxed my thread to help with the first row tension, and stitched through the first bead again. Then I clamped the thread about an inch past the ring of beads. Holding the beads flat on my fingers, and in place with my thumb, I began to peyote stitch the first row on the outside of the ring, with the dark blue.

I keep the clamp under my hand, out of the way of the thread, like this.  The weight of the clamp, and my fingers held together keep my tension snug on the first row of peyote, but this works best of you have waxed with either beeswax, or microcrystaline wax, to improve grip.  I think of shaping the beads as I go, in to the shape I am trying to create, so when I was done with this step, I had a rough, rounded looking square.

Then I stepped up into the middle row, and again into the center of the rounded square of beads.  Notice I am in the middle of a side here.  I think that is much easier than starting at a corner.

Since I have 4 sides, and my magical 64 beads divide by 4 into four sides of 16 base row beads, I know that I would have eight delica beads on each side of my square.  But now it is time to begin shaping my square more precisely.  So instead of stitching 8 delicas on each side, I will only stitch seven, and skip a bead at each corner, pulling the corner into a neat right angle.

I stitched three light blue delicas, added a lighter blue satin delica and then took a stitch without adding a bead when I got to my intended corner.  In this picture, I have put my satin bead on and taken a stitch and then taken a second stitch, without a bead.  Could have been a clearer picture had I done each step separately.  :)  I did the color switch in the interest of my white caps, but if you are just wanting the nice square bezel, no need to change colors.  Snug up your corner before proceeding.

Then for my next side, I stitched one satin delica, five light blue delicas, one more satin delica, The seven beads for the side, and skipped adding a bead on the 8th stitch again. I repeated this until I got back to my starting point, and my square was complete.  Each side has 7 delicas, one satin, 5 light blue, and one satin, and a stitch without a bead.


So here is the finished square, wiht my needle demonstrating the step up into the next row of peyote bezel.

In my next row, I stitched two light blue satin delicas, one pearl white delica, and a 15/0 white pearl rocaille at the corner. As you continue around the bezel, each row in this round will have a white pearl delica, four satin delicas, a white pearl delica, and a 15/0 pearl rocaille in the corner.  This could be a stopping point for a nice square bezel, and you might also be able to use 15/0 rocailles in each stitch, but keep your tension relaxed if you do not want your bezel to tighten excessively.


In my particular bezel, in the next row, we will decrease again, and we will also begin adding our white seafoam droplets.  So we will peyote stitch two satin delicas, one white pearl delica, and at the corner, stitch in a small white pearl drop bead.  Each repeating row in this round will have a white pearl delica, three light blue satin delicas, a white pearl delica and a small drop at the corner.


The next row is a little trickier, because it includes a step down into the previous row at the corners.  Begin by stepping up into the new row, and stitching one white pearl delica, and one small pearl drop.  Then step down into the previous row and move into the next side through the corner pearl drop, and step back up into the new row.  Each row in this round will contain the step up you just did, a small white pearl drop, two white pearl delicas, a small white pearl drop and the step down into the previous row to pass the corner. 

With the last side of this round finished, your bezel looks like this:


Now for the final row, which also includes a corner step down, this time through two rows.  Step up into the white delica, and add a three 15/0 pearl bead picot, which you should push out, over the finished portion of the bezel.  Step down two rows and pass the corner through the first small pearl drop again, and step back up two rows and add another picot, pushed out, and a large pearl drop, laying in over the top of the bezel, followed by another pushed out picot, and a step down, the process repeating to finish the final row of the bezel.  Here you see me stepping down to the outside edge of the bezel, and most of the picots and drops are sitting where they should be, but you must align them correctly when you are done.  There is only room for them to sit where they should, but you have to show them where that is.  I have not correctly oriented the last side of the last row in this picture. As you step past the original thread tail, make sure it stays on the outside of the beadwork, so you can stitch it back in and trim it off at your convenience.

At the outside row, I added a final dark blue row of delicas, with an 8/0 bead at each corner to create an easy place to attach my components together and drape through them. These 8/0's also enlarge the frame enough to fit the cabochon easily.

After stitching this row, I popped in my cabochon, after painting the back of it with clear nail polish to protect it from wear, and allowing it to completely dry. 


Then I turned the thread so I could keep stitching counter-clockwise, as I am right handed and that is my strong preference.  I peyote stitched a row of delicas, with 15/0 rocailles at the corners to begin the tightening process and stitched an additional row of delicas to secure the cab.  You could continue with additional rows if you liked, but the cab is secure with this row. 

I did stitch one final row of 15/0 on one bezel, and two on the other two, which you can see in the image of the finished back of the work.


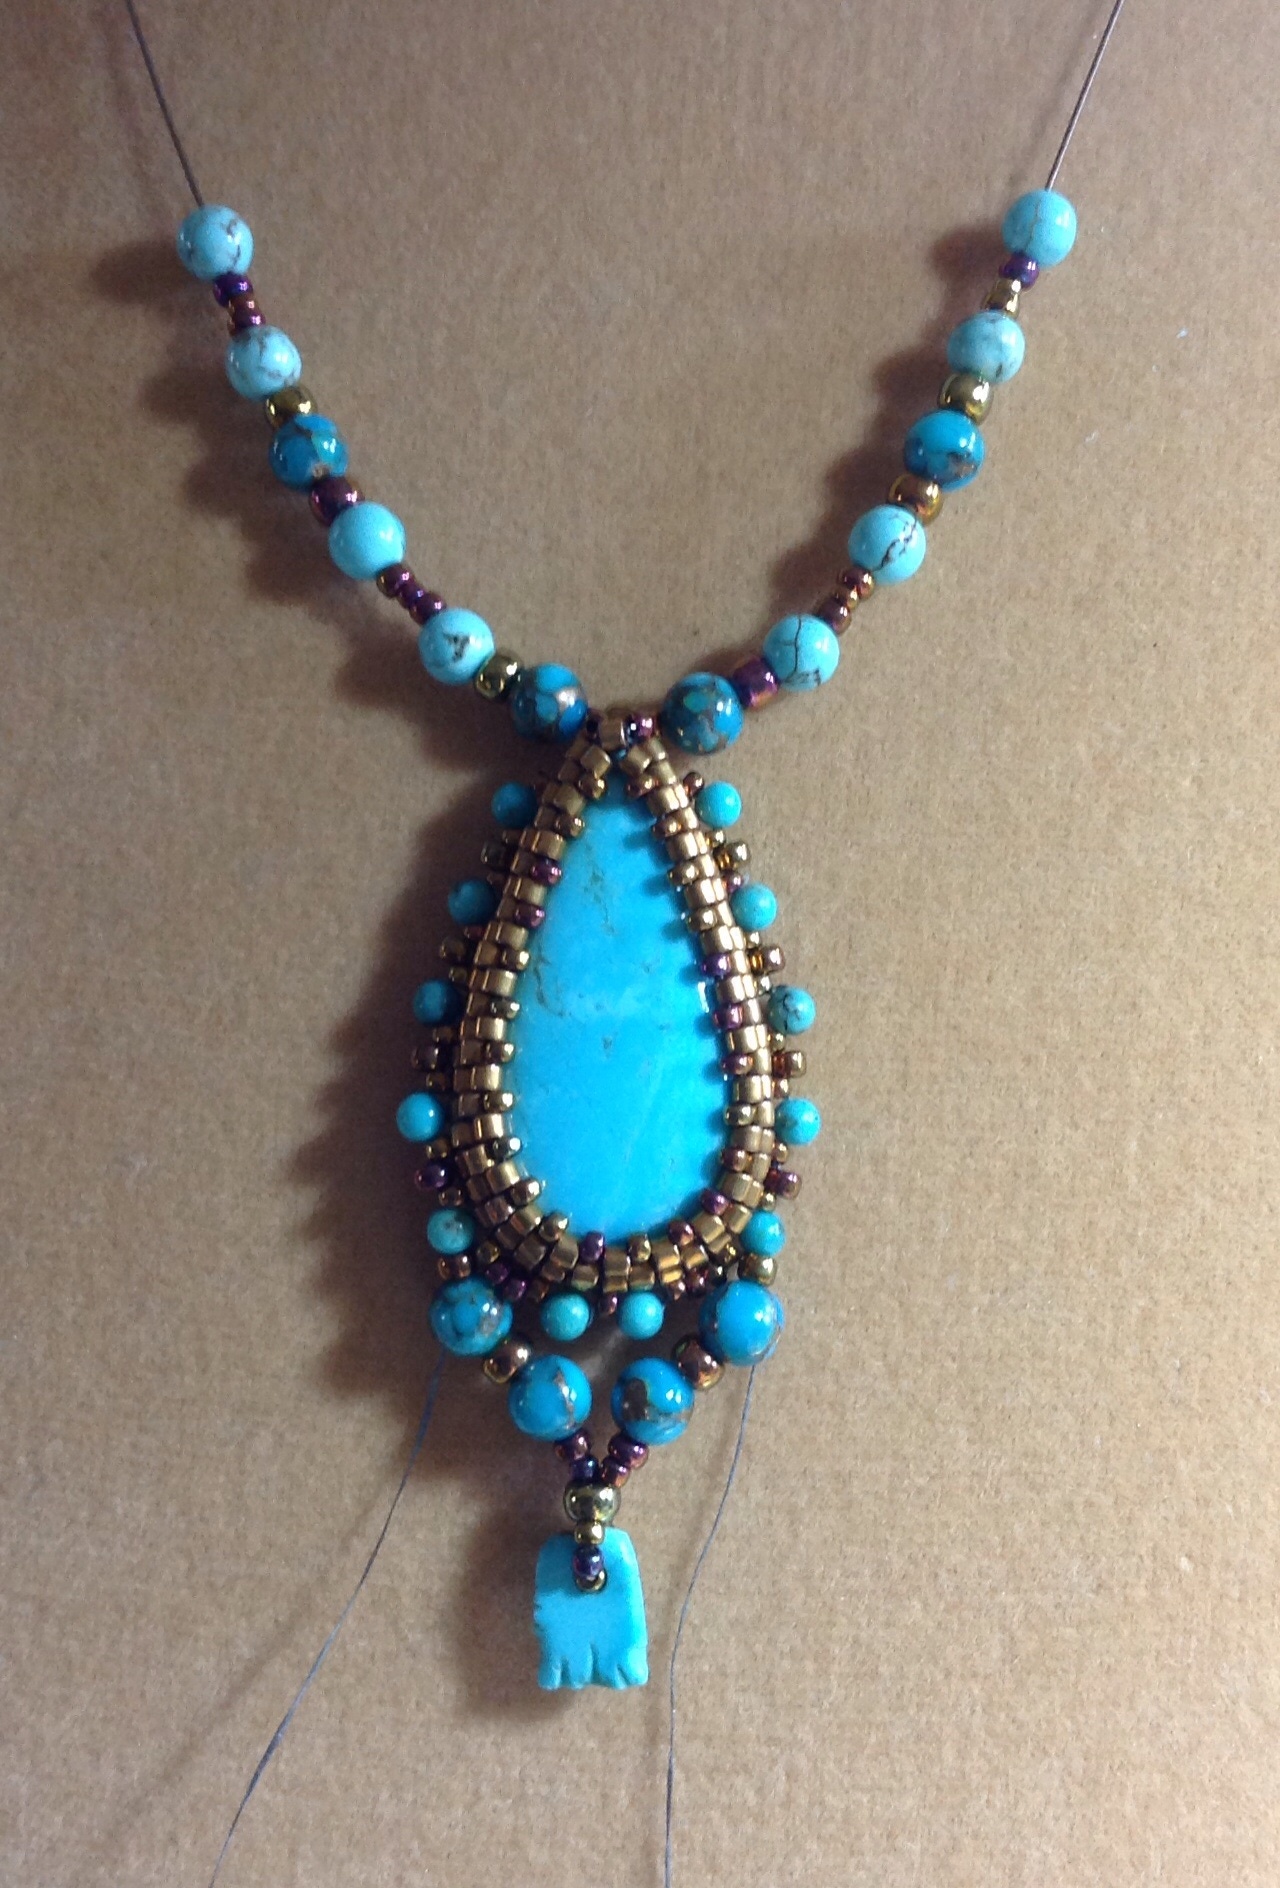
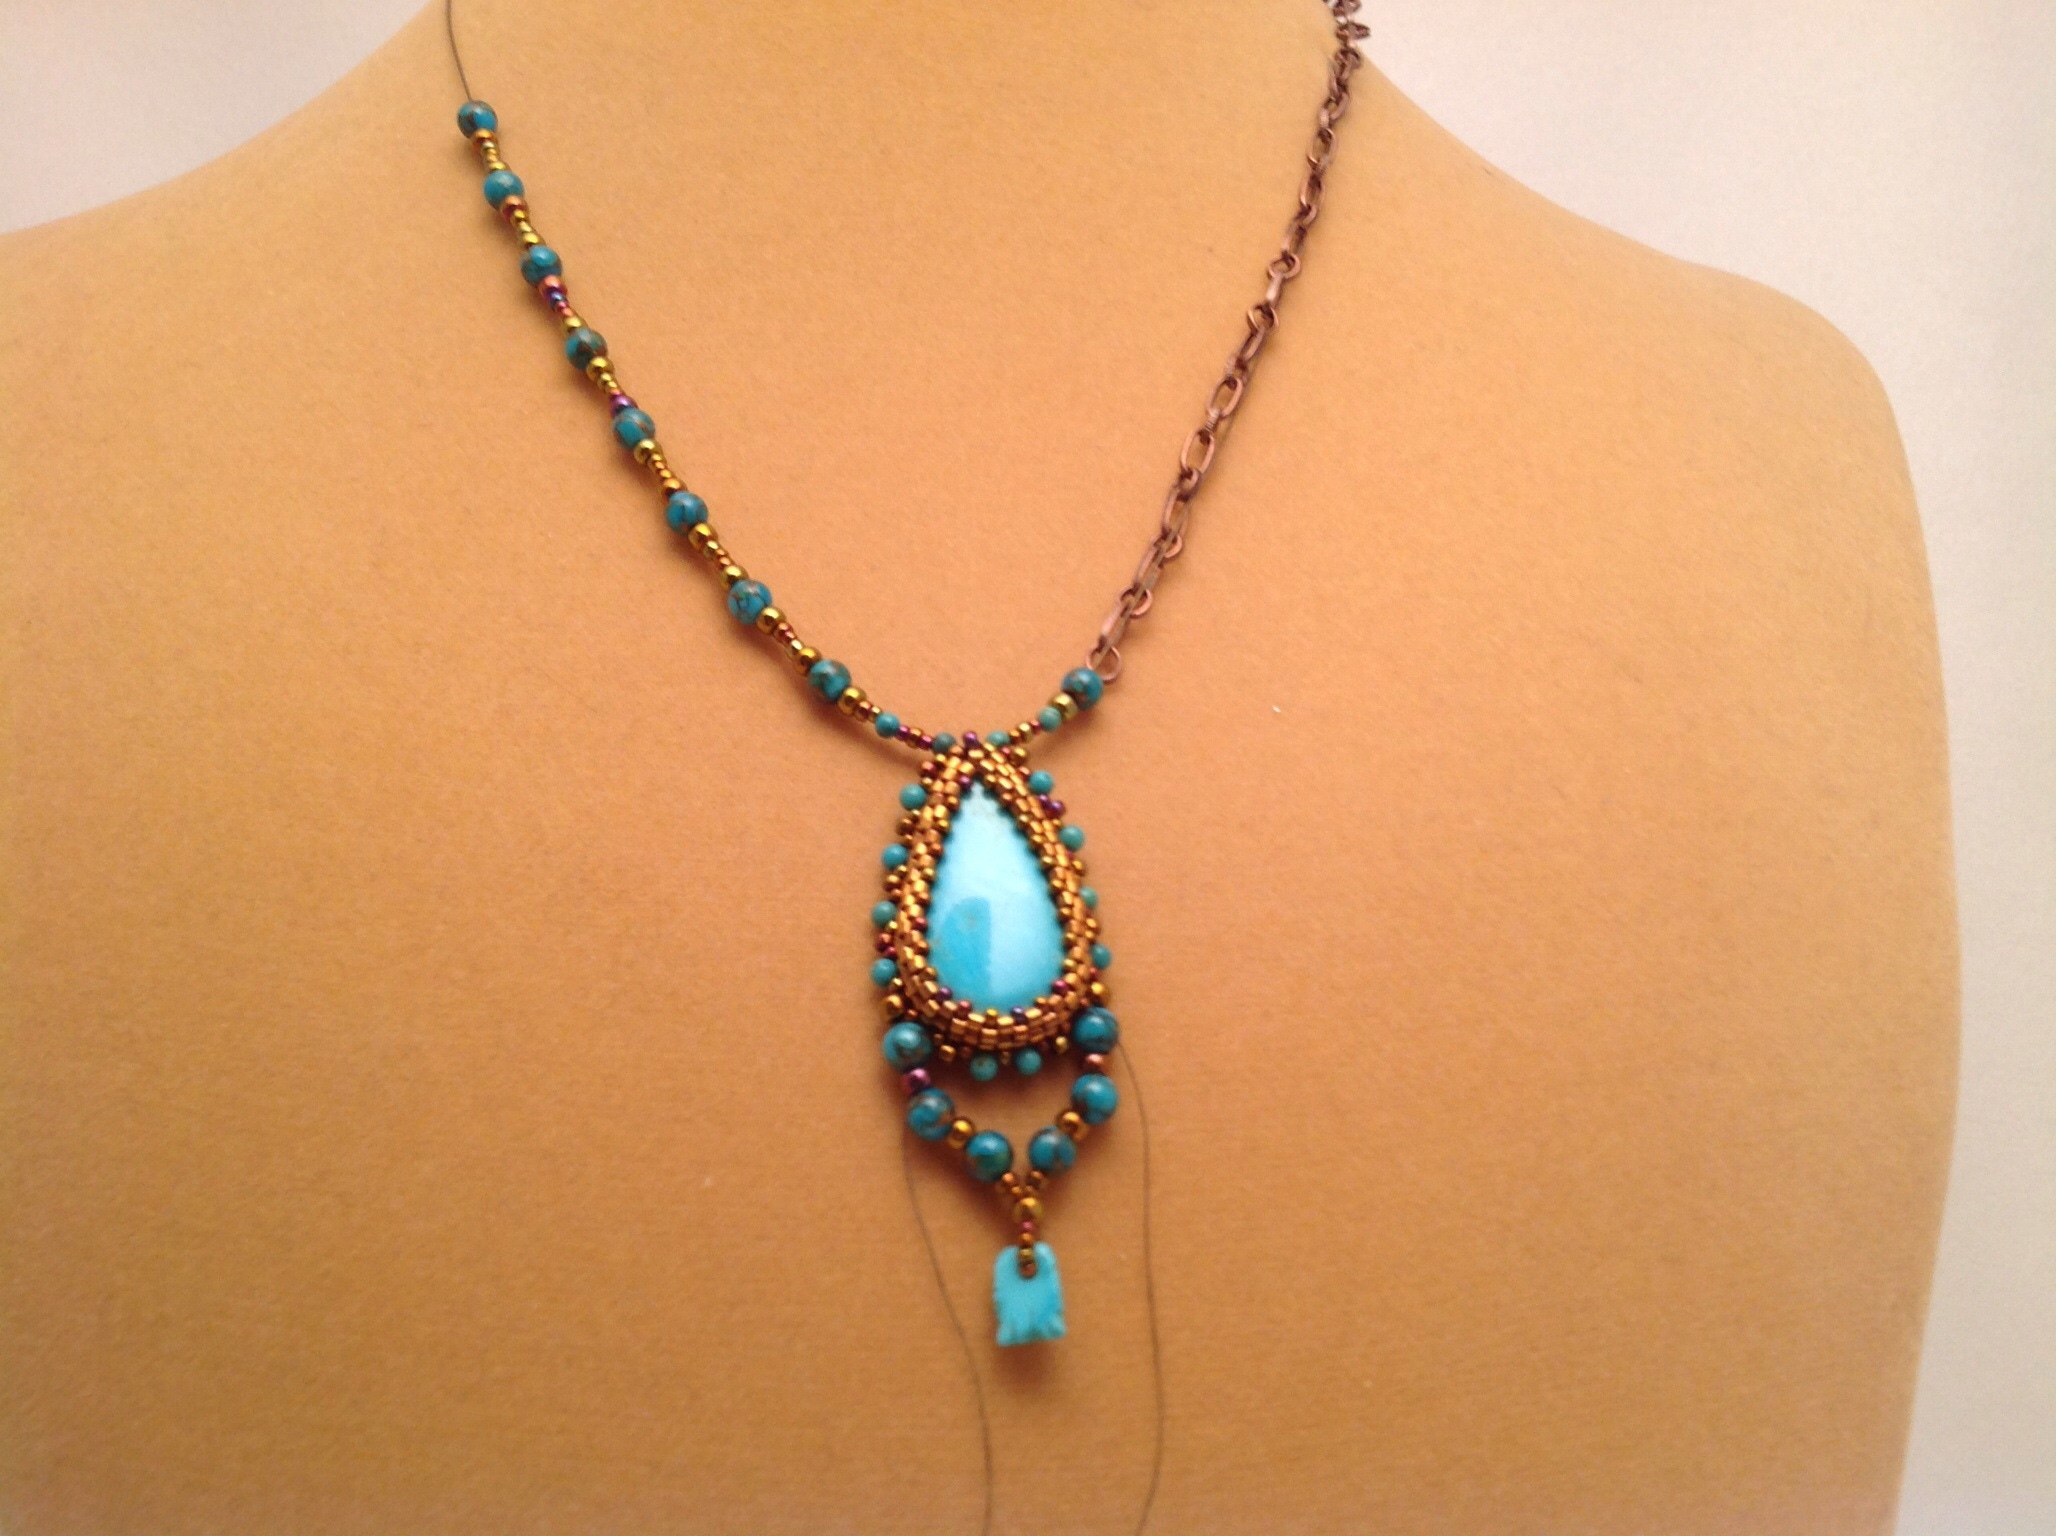
Now, since this little necklace has been poorly received, I will not continue with the rest of the necklace, and probably, if anyone actually uses this bezel advice, they will stop at the square frame work many steps ago.  But the best information is the numeric info, and perhaps, I will show other shapes more simply in future posts. 


I personally like this piece, and I think it looks great with denim.  I really enjoyed embellishing the bezel centers in my Artichoke! piece, and wanted to explore that idea further here.  I think the intense matte blue color is off-putting to some, perhaps. I liked the absence of shine because it made it feel deep to me, like an ocean. And without any metal beads, beadwork looks less like legitimate jewelry.  I think my own feelings about the ocean might be off-putting as well.  I purposefully threw the squares into tumbling action, because I have terrible motion sickness, and just looking at the ocean makes me feel disoriented and dizzy.  I wanted the work to have a horizon line that would shift in wearing, rarely being perfectly horizontal, and it does that really well. :) I liked the fringy tassel for the same reason, and the curved drapes reminded me of waves. 

For me, a happy result.  For others, not so much, but the great thing about what I do with beads is, in my day job, where there is always a client to be interpreted, flattered, made beautiful, and pleased.

 At my beading bench, there is only me.